

Estimated reading time: 18 minutes
Here’s my list of home maintenance tasks you can perform and never grab the tool bag + a few others that require very few tools or effort. These tasks are incredibly simple and meaningful to inspectors and insurance adjusters.
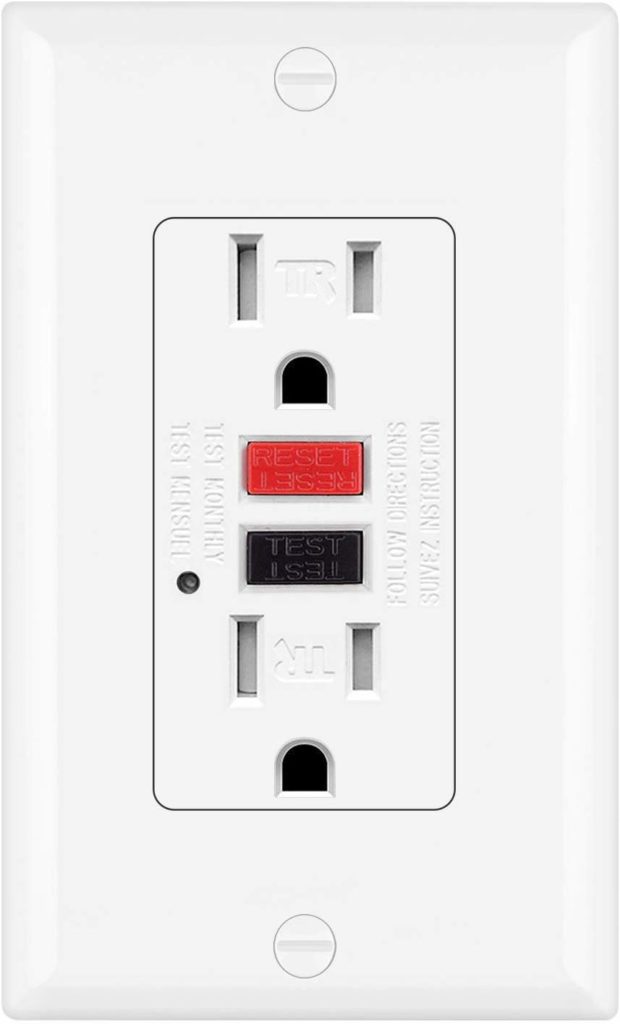
Test your GFCI receptacles.
Believe it or not – ground-fault receptacles will eventually fail. Some fail sooner than you might think, especially in areas where moisture may enter the device. It’s why we put covers on outdoor GFCI devices.
They have a life cycle of about 15 years but can fail after only 5 – or even sooner. Check out the USCPC – US Consumer Product Safety Commission fact sheet for more info. Something as simple as a power surge or nearby lightning strike can affect them, and both can happen at any time of the day or night.
You’ll find them located in your kitchen, bathrooms, garage, near tubs and pools, and on your porch or other wet locations.
Because they can be affected by power surges, this important safety device should be regularly tested – once a month. Remember – look for the devices inside and outside the home.
Push the test button with your finger, and then push the reset button. If it doesn’t reset, don’t take a chance – call an electrician for a replacement.
Some older homes don’t have them. Here’s a handy GFCI History Chart that explains the device’s usage evolution.
Clean and Maintain Exhaust Fan Covers/Filters
Exhaust fans in the bathroom and kitchen have removable covers. Some are held in place by small wire clips. Others are pushed into slots.
They’re made of dishwasher-safe plastic or metal. Toss them in the dishwasher and clean the fan filters free of dust and debris. Or – – place the fan cover on a towel and use a vacuum equipped with a bristle brush dusting attachment. Clean the cover and grille thoroughly, both inside and out. While the cover is off, clean inside the fan housing and around the motor.
Operate the Water Heater TPR Valve
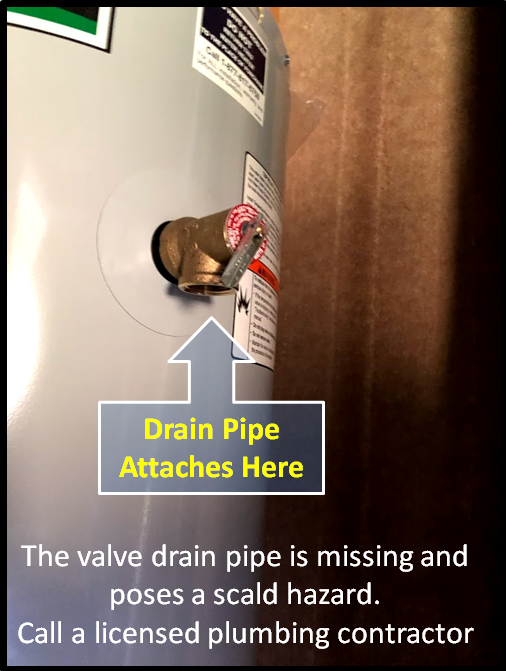
The TPR, temperature and pressure relief valve is typically mounted on the top or side of the tank. When the temperature inside the tank exceeds a certain value or the pressure rises above a certain limit, the valve opens and lets out water. Cool water entering the tank lowers both temperature and pressure. Without the valve, the rise in temperature or pressure could damage the tank and pipes or, in some cases, even cause the tank to burst. Every TPR valve includes a handle so it can be manually operated. It’s a good idea to test TPR valves regularly.
Caution: If your water heater doesn’t have a valve or the valve doesn’t have a drain pipe – STOP – call a licensed plumber. If the valve does have a drain – you should use caution when testing and operating the valve. When in the open position, hot water will discharge through the valve. If water continues to flow or leak through the valve after you operate the handle, STOP – call a licensed plumber. The valve should be replaced.
Test the Garage Door Balance Spring
This task should be performed at least once a year. It’s simple. If you have a garage door opener with the door in the closed position, disengage the opener by pulling the red handle on the release rope.
Manually lift the door about 1/2 way up. If not properly balanced – the door will not fall closed or quickly jump open during the test. While you’re checking the door, take a few minutes and spray the chain or belt, the hinges, and the rollers with a silicone-based lubricant.
How to replace a garage door weatherstrip.
Important: DON’T USE WD-40 or other solvant for this task. WD stands for “water displacing” and its main use is as a solvent or rust dissolver. The lubricant-like properties of WD-40 come not from the substance itself, but from dissolving components. It’s best to use a silicone or graphite based lubricant.
Change Your Air Filter – (at least every 90 days)

I’m sure you’ve heard this one before.
I can’t stress how important it is to replace your heating and cooling air filters often. The filter removes airborne particulate that will clog the cooling system. Of the tips and ideas I’ve listed – this simple task is one of the most important.
When considering heating and cooling maintenance, here are three things you SHOULD NOT DO. Leave these to the pros.
DON’T TRY TO CLEAN THE COILS.
Inside your A/C – the evaporator and condenser coils are delicate: those tiny fins are easily damaged if you use the wrong cleaning product or method. Damaged coils will lead to overheating and could create larger failures.
DON’T TRY TO FIX A LOW REFRIGERANT CHARGE.
This task calls for trained precision and knowing exactly how much refrigerant is needed. If your AC is low on refrigerant, it probably has a leak that must be found and fixed. Cleaning your unit can prevent this problem. Dirt and contaminants can corrode lines, leading to refrigerant leaks.
NEVER TRY TO FIX ELECTRICAL ISSUES.
If there’s damage to your AC or furnace after a power outage, power the system down and leave it off until you get help. If you’re not trained to handle electrical components, doing this yourself can be a deadly mistake.
My best tip: Call your HVAC contractor for a maintenance schedule and service contract. Have the system checked annually. In the long you’ll be glad you did.
Inspect Your Fire Extinguisher(s)
You don’t have a fire extinguisher? For your safety – get one!
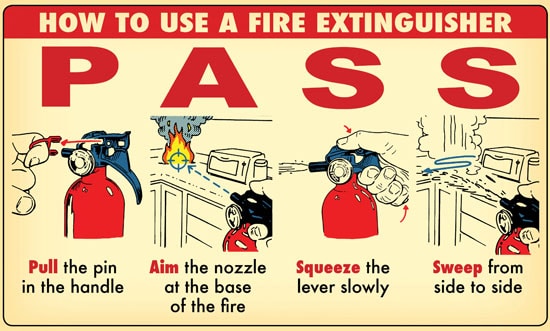
I’ll assume you have and know how to use an extinguisher. This inspection doesn’t require much: (1) ensure it has easy access (not being blocked by a garbage can or anything else), (2) ensure the gauge shows adequate pressure, and (3) ensure it has no visible signs of wear and tear.
Best Locations For Fire Extinguishers: At a minimum, the kitchen and garage. But you should also install them on every floor of the home and in areas where you’ll have a flame (like the back patio or outdoor kitchen).
Kitchen: According to U.S. Fire Administration statistics, the kitchen is the place where fires most often start. Most grease fires can be contained if you have a fire extinguisher in the kitchen. Do not put the fire extinguisher near the stove, as it will be out of your reach if the fire is on the stovetop. The best place to put the fire extinguisher is by the kitchen door, ensuring easy access to it.
Garage: It is a good idea to keep a fire extinguisher here because, in most homes, this is the place we use as storage. Leftover paints, solvents, and building materials will often be piled up without a second thought. Again, the best location to mount the fire extinguisher is by the door.
🔥Speaking of fires, check out this post about fire separation rules that keep you safe.
Replace the Batteries
Twice a year, change the smoke alarm batteries, and once a year, change your thermostat batteries. Some smoke alarms have 10-year batteries.
No special tools are required to open the housing.
Every ten years, you should swap the smoke alarms out. Also – if not already wired together, the alarms should be hardwired to sound the alarm when one detects smoke or fire.
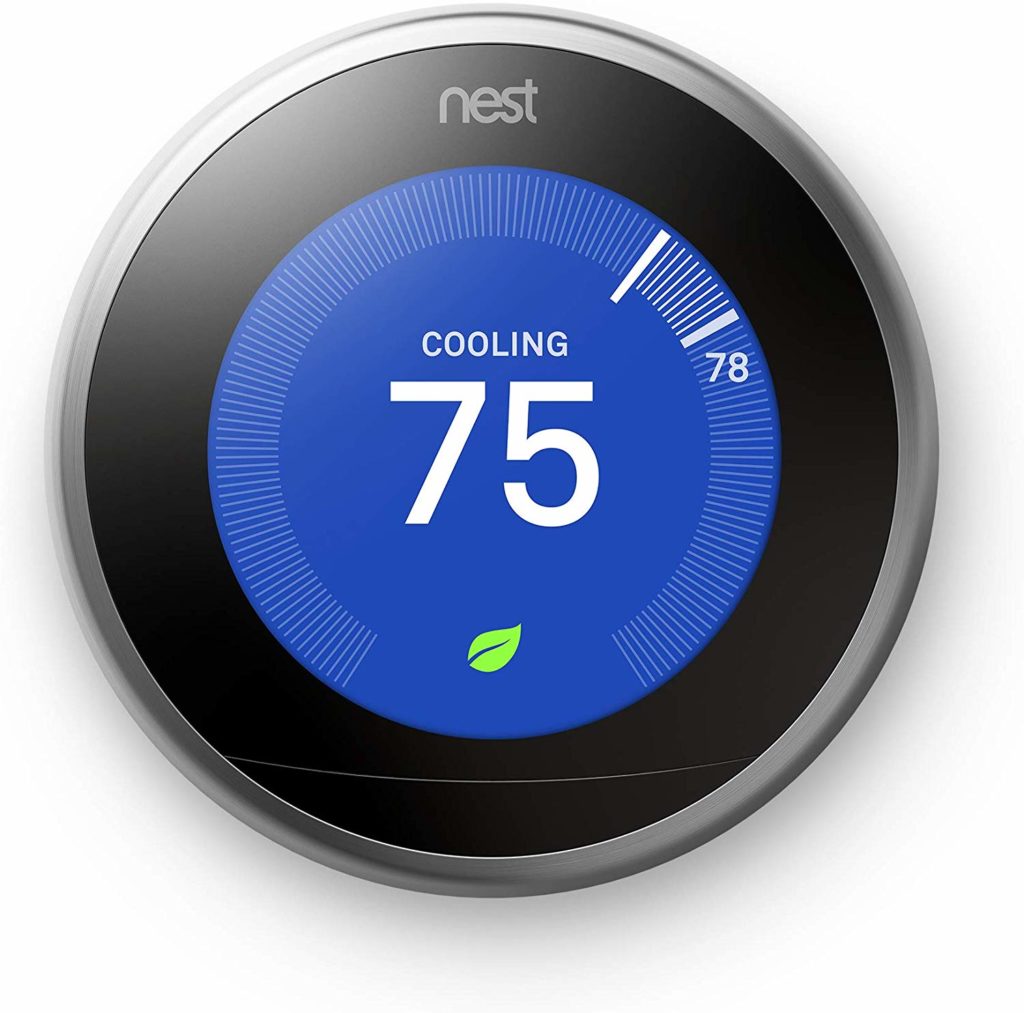
I recommend you install a programmable thermostat. The Nest uses an auto-scheduler to learn your desired temps (no pre-programming necessary). The Wi-Fi-enabled temp setting can be changed from your phone, tablet, or laptop. It works with almost all 24-volt heating and cooling systems, including gas, electric, forced air, heat pump, radiant, oil, hot water, solar, and geothermal systems.
Tools Every Homeowner Needs
You don’t need tools for the tasks I’ve listed above. However, being prepared to fix a problem should be every homeowner’s priority (or at least until the pro shows up).
Here is my top 10 list of hand tools every homeowner should keep in their toolbag.
1. A hammer. The most basic – everything seems to begin with this tool. You’d be surprised how often you need a claw hammer. It’s simply indispensable.
2. Combination pliers. Pliers come in handy in just about every application (tightening bolts, removing screws, cutting wire). They are versatile and useful. I prefer ones with rubber on the handles.
3. Vise grips. If you need something held in place while you work, vise grips are the best tool. Just adjust the screw end, and the vise grips stabilize just about anything.
4. Tape measure. An easy-lock metal tape measure will serve you well. Try to get one that measures at least 16 feet.
5. Needle-nose pliers. Combination pliers cousin is the needle-nose pliers. They come in handy, particularly with electrical work or when you need to reach a tight spot.
6. Screwdriver set. The set doesn’t have to include a huge selection. A few different sizes of both Phillips and flathead screwdrivers will come in handy.
7. Utility knife. Sharp as a razor – get a utility knife for all of your precision-cutting (and scoring) needs. Always be careful – they’re sharp!
8. A power drill. Ok – it’s not so much a hand tool in the traditional sense, however, for simple around the house tasks a small battery operated drill can be very handy. The most common chuck size is 3/8 inch. The chuck is the end that holds the bit. A 3/8 chuck will hold drill bit shanks up to 3/8 inch thick.
9. A level. From hanging pictures to leveling your stove or installing your mailbox, a level should be a priority for any do-it-yourselfer. They vary in size from 6 inches (bullet level) to up to 6 feet long.
10. Tapes and hardware. Try to gather a collection of various tapes (electrical tape, plumber’s tape, duct tape), and some different hardware (multiple sizes of screws and nails) to complete your home maintenance set.
Now, all you need is a toolbox!
Did you find this article helpful?
If so, consider donating me a cup of coffee for my writing.