

If your biscuits, pies, or cornbread isn’t browning/cooking the way grandma used to…you may need to calibrate your oven temperature.
The first step – get a good thermometer.
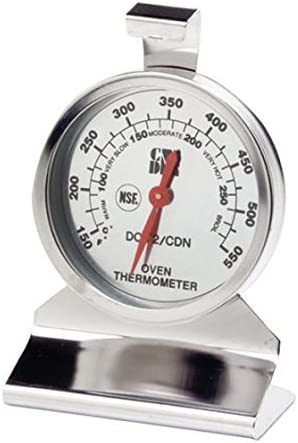
You can purchase highly recommended models for less than $10.00. All dial-face thermometers work using a similar internal mechanism. A bimetallic strip (two pieces of different metals pressed together) is wound into a tight coil and connected to a dial. The two metals expand and contract at different rates when heated or cooled, moving the dial on the face.
As simple a mechanism as this is, quality controls vary from factory to factory. I recommend the CDN ProAccurate Mechanical Thermostat (pictured above). CDN is based in Portland, OR, and carries a wide range of measuring devices. America’s Test Kitchen recommends the ProAccurate DOT2.
TO TEST THE OVEN
- Place your thermometer in the center rack, where most food cooks. Set the oven to 350 degrees.
- Allow the oven to preheat for at least 20 minutes and take a temperature reading. This will tell you if the oven reaches the desired temperature from the beginning.
- To test if the oven is calibrated and maintaining its heat, continue to take readings every 20 minutes for the next hour and a half to two hours.
- Divide the sum of the readings by the number of readings you have taken. The average should be around the original set temperature.
TO ADJUST THE OVEN (Knob Style Control)
Follow these steps:
- First, ensure the internal thermostat sensor inside the oven is secure and not touching the inner walls.
- Next, place the oven thermometer in the center of the middle rack. Set the oven to 350ËšF (176.67ËšC) and let the oven heat for at least 20 minutes. Take a reading of the internal temperature and a reading every 20 minutes for the following hour and a half. Calculate the average of the readings.
- Next, remove the plastic knob from the temperature dial. It should pull off without tools. If you have trouble removing it, slide a screwdriver behind the knob and gently pry to remove it.
- Mark where the alignment flat spot (or slot) on the back of the knob is with a marker so you can reference it or come back if something goes awry.
- Next, use a screwdriver to loosen the screws holding the outer part of the dial to the inner mechanism.
- Calculate the difference in the set temperature and the calculated average. Hold the stem and rotate the dial counterclockwise if your oven is not reaching the correct temperature. Hold the stem and rotate the dial clockwise if the oven runs too hot.
- Tighten the screws and reattach the knob to the dial on the oven.
- Optionally, you can test the adjustments by taking the oven’s average temperature and repeating the steps as necessary until the oven reaches the desired temperature.
For digital style controls, consult your owner’s manual. This video will give you some basic idea of the steps to take.
WHEN TO CALL APPLIANCE REPAIR
If this doesn’t fix the issue, the problem could be with a faulty heating element, thermostat sensor, or another component. If your temperature is off by more than 100ËšF (37.78ËšC) or the heat oscillates by more than 20ËšF (-6.67ËšC) above or below the set temperature, you should consider calling a professional appliance repair contractor.