

</p>
Estimated reading time: 10 minutes
Building codes devote a considerable amount of instruction designed to improve dryer vent safety.
According to the National Fire Protection Agency, from 2010-2014, there were almost 16,000 dryer fires associated with dryers and washing machines in North America. 82% of those fires started in the laundry room, and 1/3 of them involved lint or other combustible sources.
The following code excerpts are from the 2009 International Mechanical Code, which addresses dryer exhaust systems. 2017 statistics
“Home Fires Involving Clothes Dryers and Washing Machines” fact sheet (PDF, 452 KB)
Download these NFPA safety tips on washers and dryers. (PDF, 105 KB)
Follow These Basic Building Codes:
504.1 Installation. Clothes dryers should be exhausted following the manufacturer’s instructions. Dryer exhaust systems should be independent of all other systems and convey moisture and any combustion products to the outside of the building. Exception: This section shall not apply to listed and labeled condensing (ductless) clothes dryers.
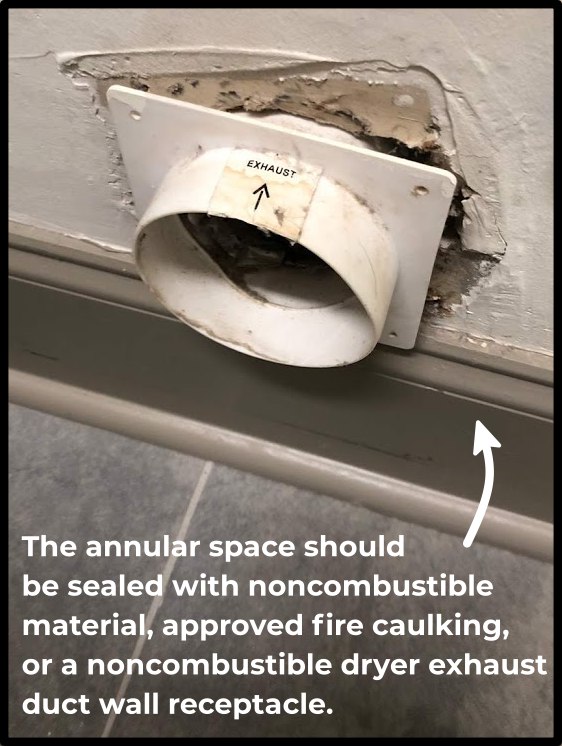
504.2 Exhaust penetrations. Where a clothes dryer exhaust duct penetrates a wall or ceiling membrane, the annular space (gap around the vent pipe) shall be sealed with noncombustible material, approved fire caulking, or a noncombustible dryer exhaust duct wall receptacle.
Ducts that exhaust clothes dryers shall not penetrate or be located within any fire-blocking, draft-stopping, or any wall, floor/ceiling, or other assembly required by the International Building Code to be fire-resistance rated unless such duct is constructed of galvanized steel or aluminum of the thickness specified in Section 603.4 and the fire-resistance rating is maintained by the International Building Code.
SafeHome Inspections – Gary Smith
Fire dampers, combination fire/smoke dampers, and other devices that obstruct exhaust flow shall be prohibited in clothes dryer exhaust ducts.
504.3 Cleanout. Each vertical riser shall be provided with a means for cleanout.
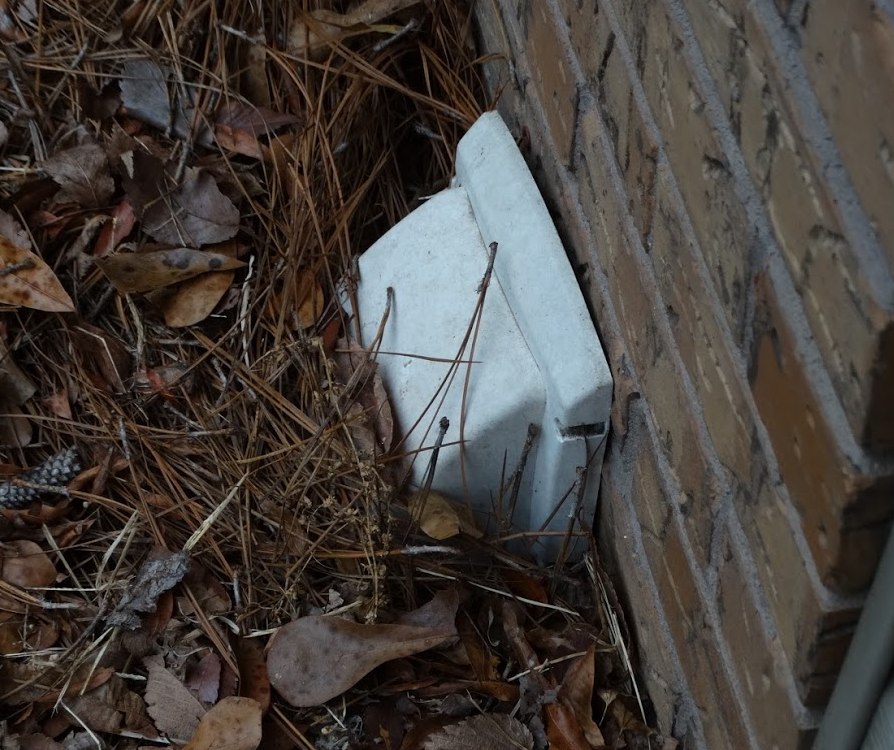
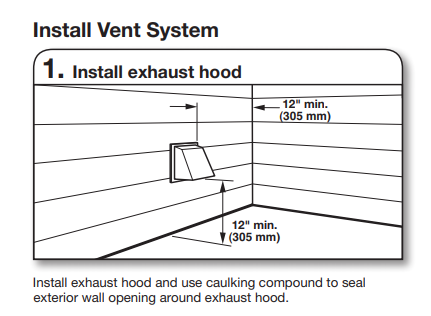
504.4 Exhaust installation. Dryer exhaust ducts for clothes dryers shall terminate on the outside of the building and shall be equipped with a backdraft damper. Screens shall not be installed at the duct termination. Ducts shall not be connected or installed with sheet metal screws or other fasteners that will obstruct the exhaust flow. Clothes dryer exhaust ducts shall not be connected to a vent connector, vent, or chimney. Clothes dryer exhaust ducts shall not extend into or through ducts or plenums.
504.5 Makeup air. Installations exhausting more than 200 cfm (0.09m3/s) shall be provided with makeup air. Where a closet is designed for the installation of a clothes dryer, an opening having an area of not less than 100 square inches (0.0645 m2) shall be provided in the closet enclosure, or makeup air shall be provided by other approved means.
504.6 Domestic clothes dryer ducts. Exhaust ducts for domestic clothes dryers shall conform to the requirements of Sections 504.6.1 through 504.6.7.
SafeHome Inspections – Gary Smith
504.6.1 Material and size. Exhaust ducts shall have a smooth interior finish and be constructed of metal at a minimum of 0.016 inches (0.4 mm) thick. The exhaust duct size shall be 4 inches (102 mm) nominal in diameter.
PVC is not rated for dryer venting. As warm moist air from a dryer travels through PVC pipe it becomes statically charged. Over time lint in the statically charged plastic pipe will “stick” to the pipe. Watch this video.
Gary Smith
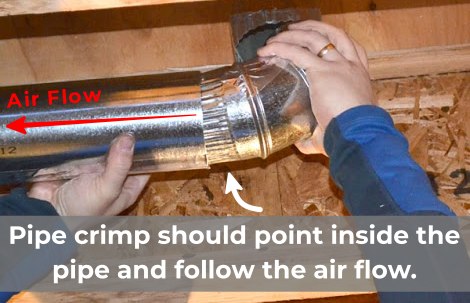
504.6.2 Duct installation. Exhaust ducts shall be supported at 4-foot (1219 mm) intervals and secured. The insert end of the duct shall extend into the adjoining duct or fitting in the direction of airflow. Ducts shall not be joined with screws or similar fasteners that protrude inside the duct.
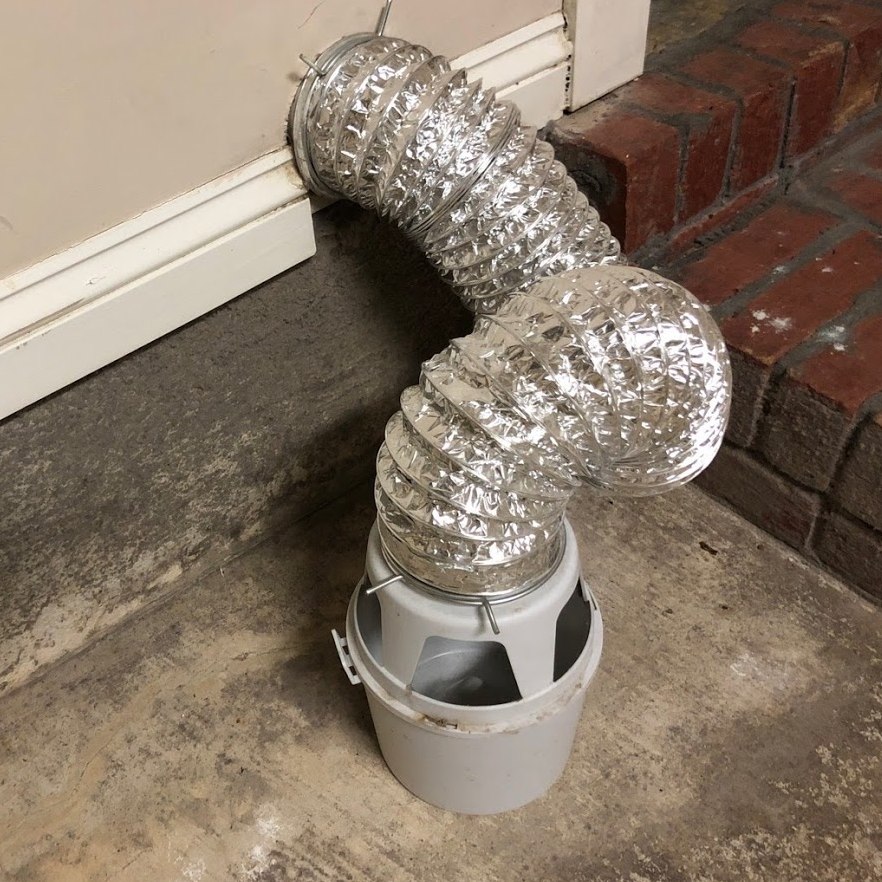
504.6.3 Transition ducts. Transition ducts used to connect the dryer to the exhaust duct system shall be a single length listed and labeled by UL 2158A. Transition ducts shall be a maximum of 8 feet (2438 mm) in length and shall not be concealed within construction.
504.6.4 Duct length. The maximum allowable exhaust duct length shall be determined by one of the methods specified in Section 504.6.4.1 or 504.6.4.2.
504.6.4.1 Specified length. The maximum length of the exhaust duct shall be 35 feet (10 668 mm) from the connection to the transition duct from the dryer to the outlet terminal. Where fittings are used, the maximum length of the exhaust duct shall be reduced by Table 504.6.4.1 – as seen below.

504.6.4.2 Manufacturer’s instructions. The dryer manufacturer’s installation instructions shall determine the maximum length of the exhaust duct. The code official shall be provided with a copy of the installation instructions for the make and model of the dryer. Where the exhaust duct is to be concealed, the installation instructions shall be provided to the code official before the concealment inspection. In the absence of fitting equivalent length calculations from the clothes dryer manufacturer, Table 504.6.4.1 shall be used. 504.6.5 Length identification. Where the exhaust duct is concealed within the building construction, the equivalent length of the exhaust duct shall be identified on a permanent label or tag. The label or tag shall be located within 6 feet (1829 mm) of the exhaust duct connection.
504.6.6 Exhaust duct required. Where space for a clothes dryer is provided, an exhaust duct system shall be installed. Where the clothes dryer is not installed at the time of occupancy, the exhaust duct shall be capped at the location of the future dryer. Exception: Where a listed condensing clothes dryer is installed before occupancy of the structure.
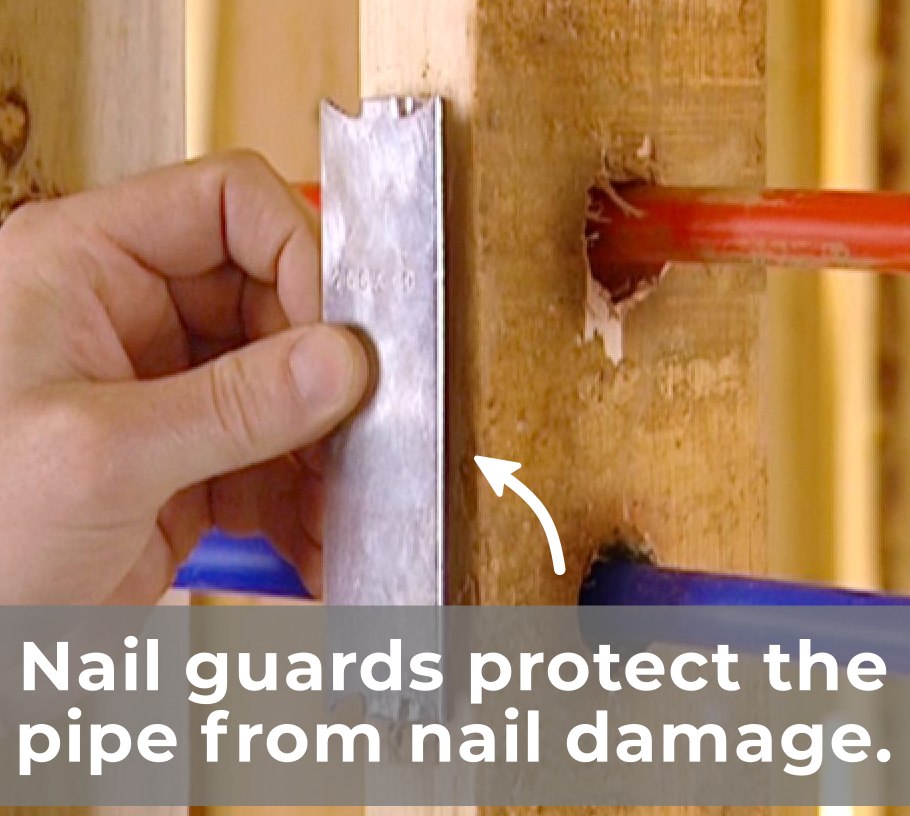
504.6.7 Protection required. Protective shield plates shall be placed where nails or screws from the finish or other work are likely to penetrate the clothes dryer exhaust duct. Shield plates shall be placed on the finished face of all framing members where there are less than 11/4 inches (32 mm) between the duct and the finished face of the framing member. Protective shield plates shall be steel, have a thickness of 0.062 inches (1.6 mm), and extend a minimum of 2 inches (51 mm) above sole plates and top plates.
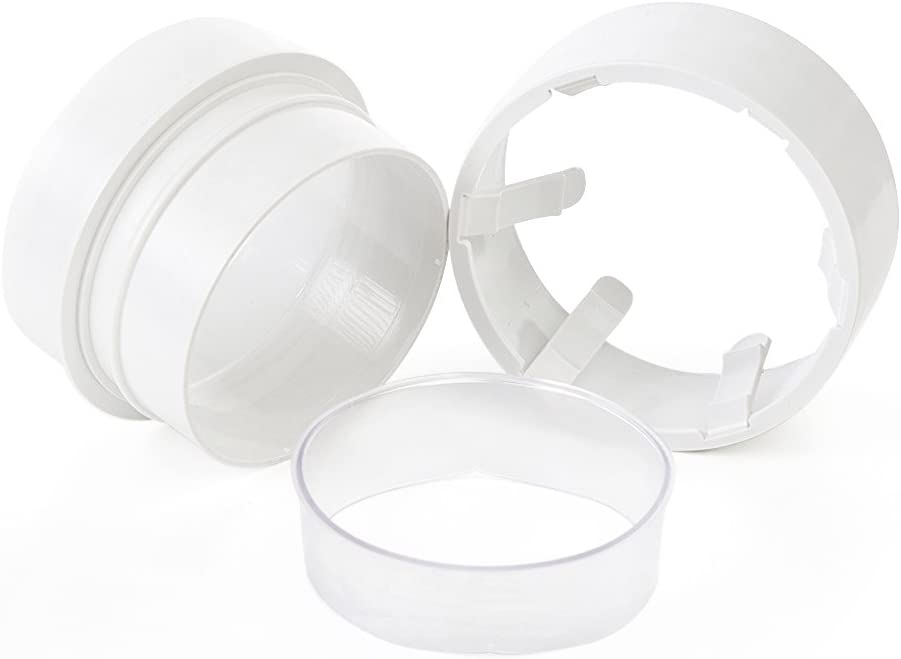
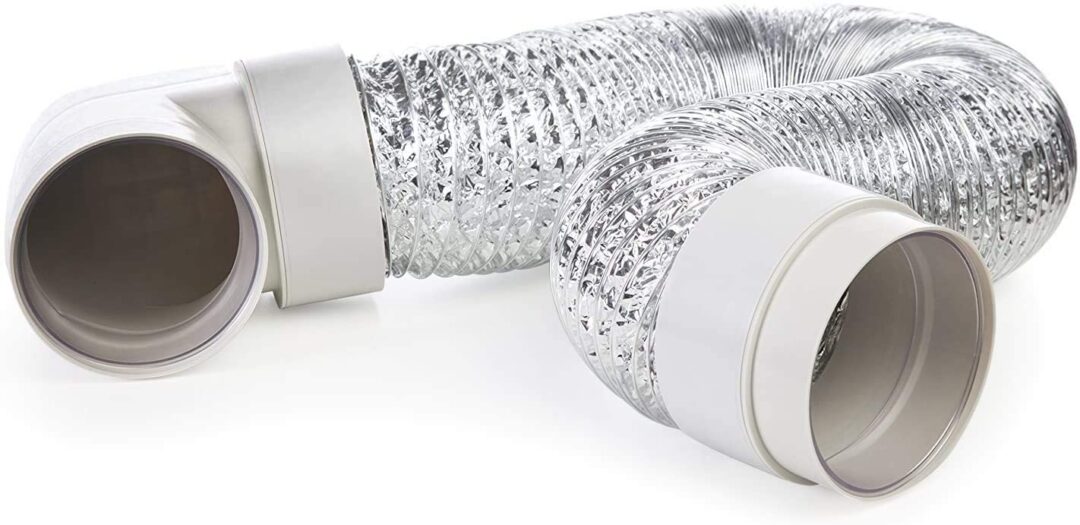
Snap-To-Fit Dryer Vent Connection
This is one of the smartest products I’ve seen in a long time and defiantly fills a need. Watch the video. It’s made in the USA. The links below go to Amazon.
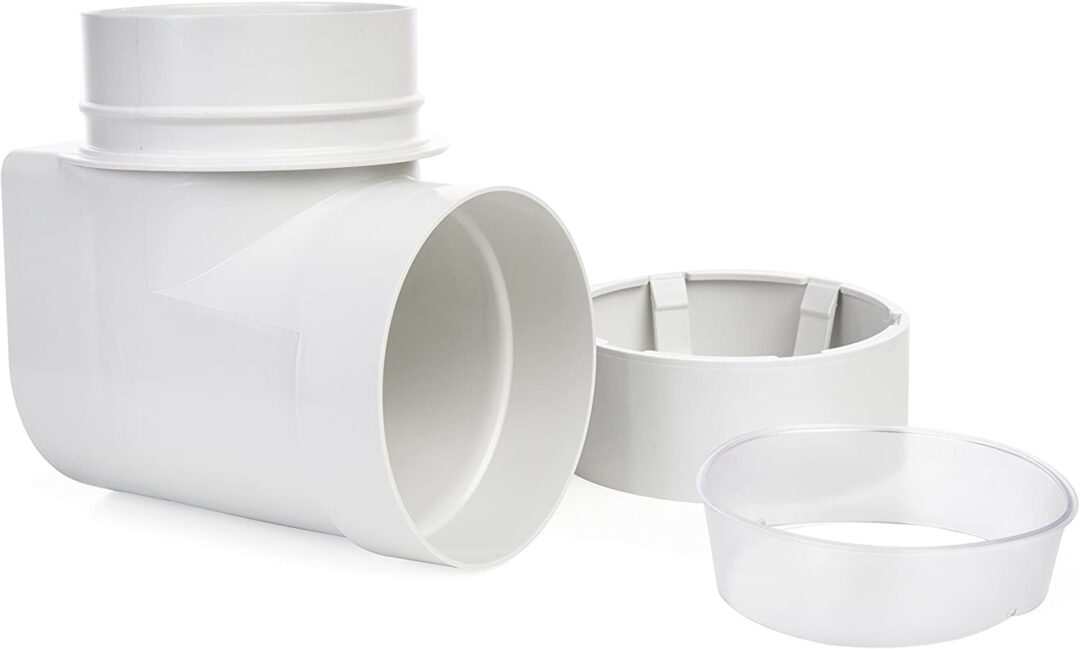
About $18.00: If you need the Snap-To-Fit elbow shown in the video, get it here.
About $16.00: You may need the straight connector that hooks to the through-wall vent pipe; get it here.
About $45.00: If you want the Snap-To-Fit flexible pipe and all their fittings in a kit form, buy them here.
About $13.00: This product is called DryerFlex. For the best 4 feet of dryer vent hose I’ve seen, it’s strong, will withstand heat, and is tougher than any hose purchased a Lowe’s or Home Depot. Buy it separately and use it with the fittings from above; find it online (not on Amazon) – – get it here.
Dryer Vents With Poor Termination Locations
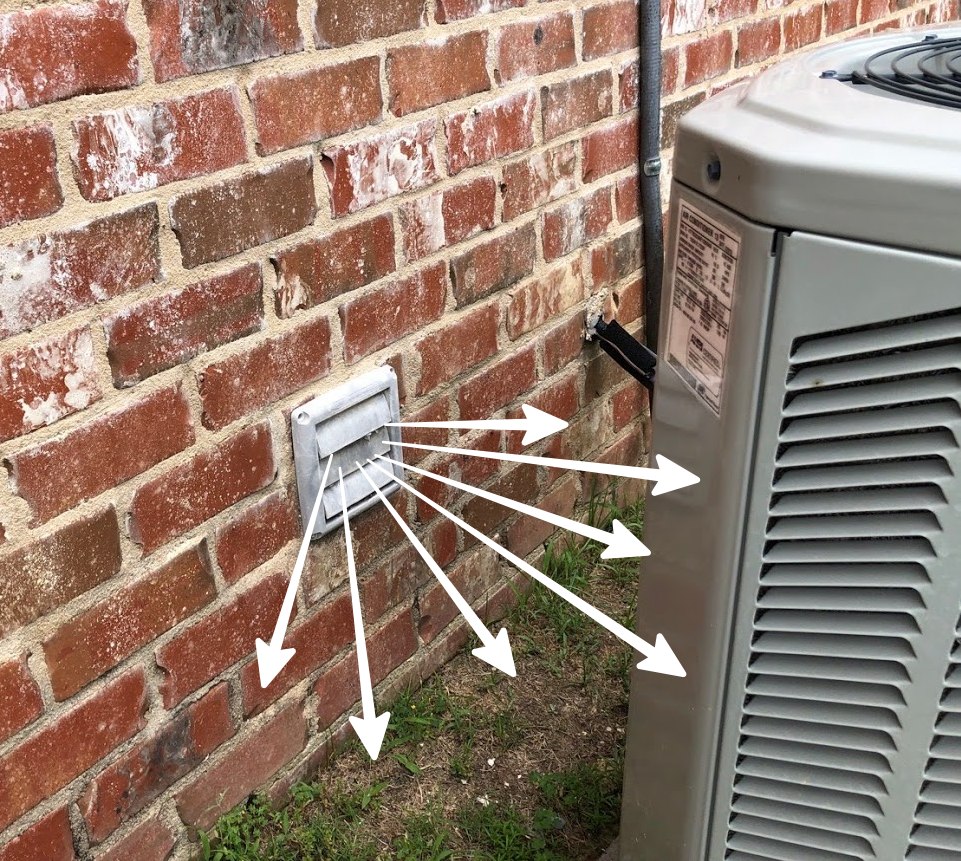
Dryer vents that terminate at or near the air conditioner’s condensing unit can clog the condenser’s fins. A clogged condenser can affect the cooling capacity and harm the A/C system. It’s a good practice to leave at least 10 feet between the dryer vent termination point and the air conditioner.
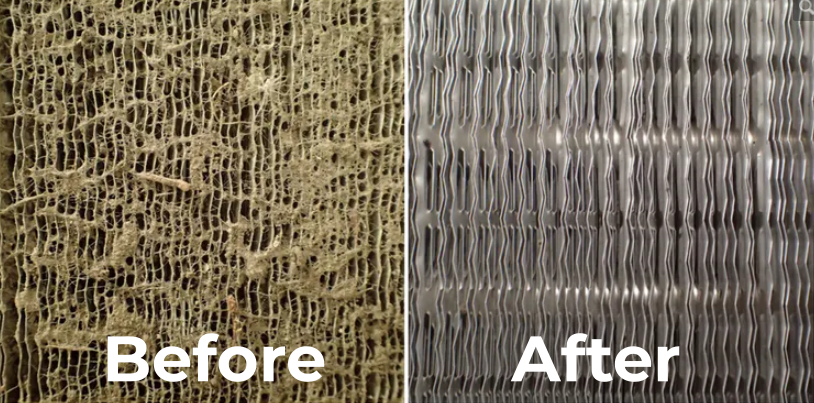
To clean the fins, you’ll need to disconnect the power, remove the top of the condenser, and spray water from the inside toward the outside of the unit.
I recommend you purchase a spray bottle and a Nu Brite condensing coil cleaner jug. Get the Nu-Calgon 4291-08 Nu-Brite at this link.
Caution: Should you have any reservations or hesitations about performing this maintenance task, STOP NOW and call a licensed HVAC professional. This task will require you to disconnect the condenser’s power. The components you will be handling are sharp and heavy – be careful.
You assume all risks by performing this maintenance task.
- Turn the power off to the condensing unit.
- Follow the mixing and application directions on the soap bottle. Soap up the fins from the outside – all around the unit. It’s best to start at the bottom and work your way up.
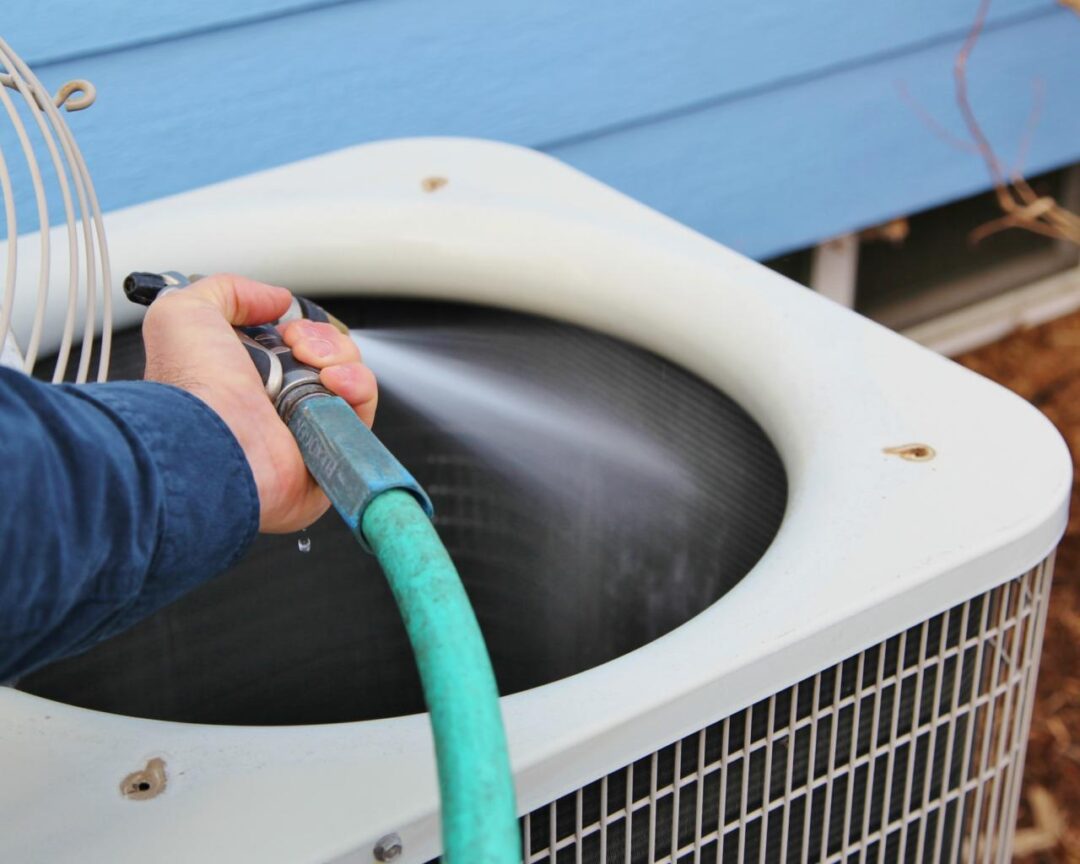
- To gain access to the inside of the unit, remove the top (the fan is attached to the top – it’s heavy)
- Using your garden hose, spray water to push the soap off the unit from the inside – out. Don’t push the water against the soap side; point the hose to the inside.
- After thoroughly cleaning the fins, replace the top and turn the power back on.
That’s it! You should be lint-free!
Good information with lots of detailed information. Thanks for sharing.
You’re welcome – more to come! 😉