

Brick is porous.
When water freezes, it expands.
Put these two together, and you have a recipe for surface spalling and freeze-thaw weathering.
Freeze–thaw weathering occurs when moisture freezes inside masonry and subsequently contracts. Upon freezing, the water expands, causing spall, a force that fragments or flakes the outer surface of the brick. As this cycle repeats the brick repeatedly undergoes “spalling”, resulting in weathering.
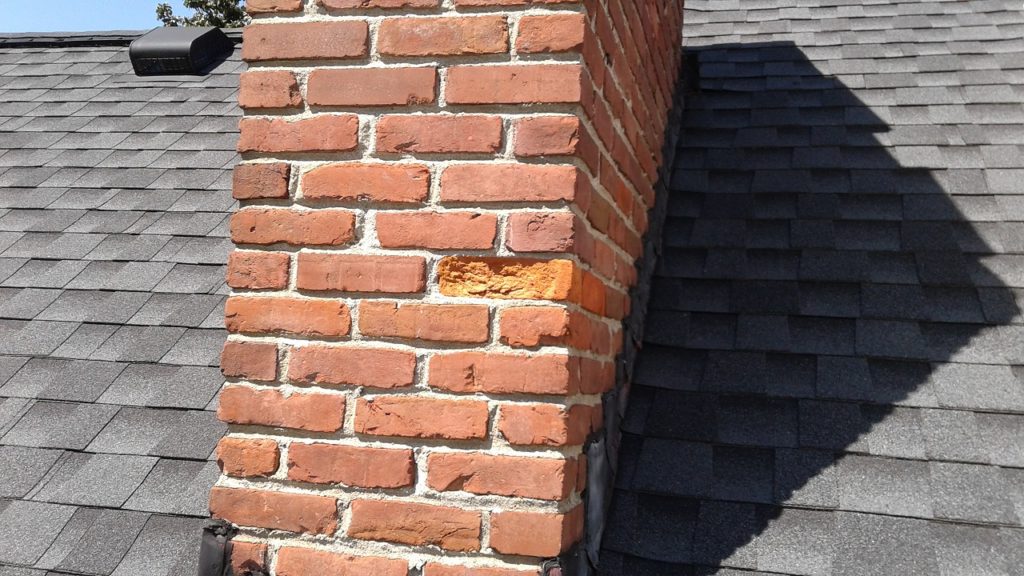
Chimneys show spalling damage before other portions of buildings because they are more exposed to the elements of weather. I’ve also seen this condition on lower portions of walls where water spatter keeps the wall damp. On patios terra-cotta surfaces (even if glazed) can be damaged when water seeps in at the edges. Brick steps are often damaged by the freeze-thaw effect.
Salt Spalling
Salt spalling is a specific type of weathering that affects porous building materials. When dissolved salt evaporates, it is transported through the material in water and crystallizes near the surface. As these salt crystals expand, they create shear stresses that cause fragments, or spalls, to break away from the surface. Additionally, dissolved salts can migrate from brick and concrete, leaving behind a white powdery residue known as efflorescence. I consider this condition to be primarily aesthetic rather than structural. Engineers believe that porous building materials can be protected from salt spalling by using penetrating sealants. These sealants are hydrophobic, meaning they repel water. The treatment penetrates deep enough to keep both water and dissolved salts away from the surface.
✅ Learn more about tuckpointing brick. Similar to repointing, the technique is different.
IMPORTANT
Great care and expert advice must be consulted to ensure coatings are compatible with the substrate (an underlying layer).
You want to allow the building to release vapor from inside while preventing liquid water intrusion; otherwise, serious problems can be created. Painting a waterproof coating on your house is like slipping the building into a sandwich bag; it wants to breathe, but can’t.
Houses need to breathe.
Under normal operating conditions, water wants to enter and exit your home as a vapor (and sometimes as a liquid). On the inside, vapor is generated in large volumes by cooking, washing, and even exhaling. If you believe it’s absolutely necessary to coat (aka paint) your brick home—to save spalling brick, for example—look for mineral silicate paints and coatings. They’re durable and can transmit 90 percent of internal water vapor.
Repairing Spalling Brick
Tools and Materials
- Bricks (of course)
- Mortar (of course)
- Hammer drill
- 5/8 masonry drill bit
- Mixing paddle
- Ladder
- Mason’s trowel
- ¼-inch tuck pointer
- Jointer
- Brush
- Water sprayer
- One-inch chisel
- Shop vacuum and extension cord
Time needed: 2 hours
How to Repair Spalling Brick – Special thanks to Brian Estill – brick mason and masonry artisan in Louisville, Ky.
-
Set up your ladder. Assuming you can reach the bricks you’re replacing – and you don’t need another ladder or anything else – let’s begin here. Use your drill and 5/8-inch masonry drill bit to drill two holes for the bricks in the middle of the wall, three holes for the bricks on the corners.
Use your one-inch chisel or hammer setting on your hammer drill to start crushing the brick. A tip for replacing spalling bricks is to begin above or below the holes. Removing the brick ought to be fairly easy. The leftover mortar on the other bricks is going to be a little difficult. -
Use your one-inch chisel to tap on the leftover mortar on the other bricks. If the chisel doesn’t work that well, use a line pin. Try to tap between the brick and old mortar. If that still doesn’t work, sand the mortar out using sandpaper. Dry-fit the brick.
-
Use your cordless drill or a small square trowel to mix up your pre-mixed mortar in a five-gallon bucket. Remember a little water goes a long way, so assure your mortar is kind of dry. Now stick your trowel, jointer, soft brush, and tuck pointers in the bucket. You’re ready to lay brick.
-
Use your water sprayer to mist the hole where you’re putting the brick. This allows for a good bond. Butter your brick, and then butter the hole the brick is going into. Slide the brick into the hole. Look at the bricks to the right and left. Is it close to being in the middle of those bricks on either side? Good, those are your head joints. How about the bricks on the bottom? Is it paralleled with those bricks? Great, that’s your bed joint. Now, use your tuck pointer to tuckpoint the top joint and pack the mortar all around the brick. Is the mortar thumbprint hard yet? Then let’s joint it, brush it, and joint it again.
-
Time to clean up your area. Use your brush and trowel to sweep up the loose bricks and old mortar. Put everything in your bucket. Take the bucket down, and then bring up your shop vac and vacuum up the remaining dust. If you can get a hose up there, hose the roof down after you’re done.
You’re finished replacing spalled bricks on a chimney. Wait a couple days, and then come back with some waterproofing sealer, a paint brush and a paint roller to waterproof the chimney.
See above – – don’t forget to use mineral silicate paints.